
So in the past couple of weeks I’ve broken out the sewing machine and made a couple things for the house. What I found most frustrating about the whole process was not the actual sewing but digging through my drawers to try to find my sewing supplies. I swear every time I try to make something, I can’t find what I need. The last time, I found my needles but not the straight pins. The time before that, I couldn’t find my measuring tape. The time before that was a missing fabric pen. And on and on…
And of course, if I can’t find the item, I end up going out to buy the item. Not only is that bad for my pocketbook, but it’s also super frustrating because of course, as soon as I buy the item, without a doubt I’ll find the missing item the next day. Ugh.
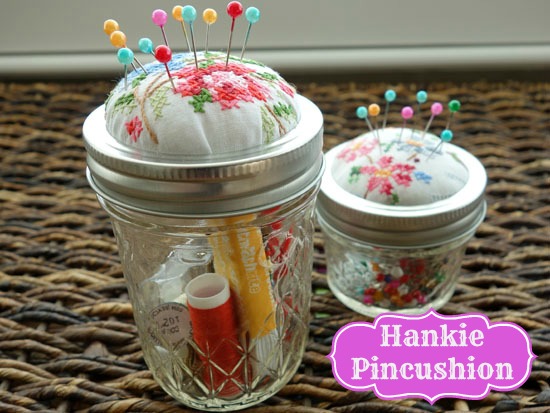
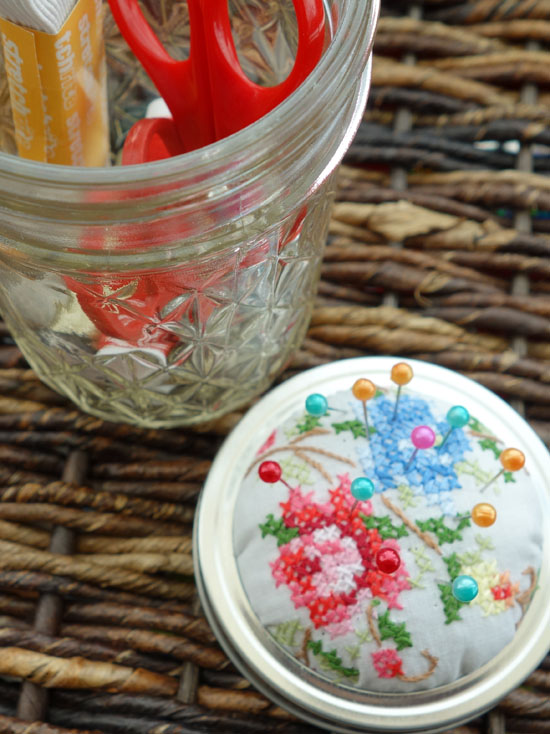
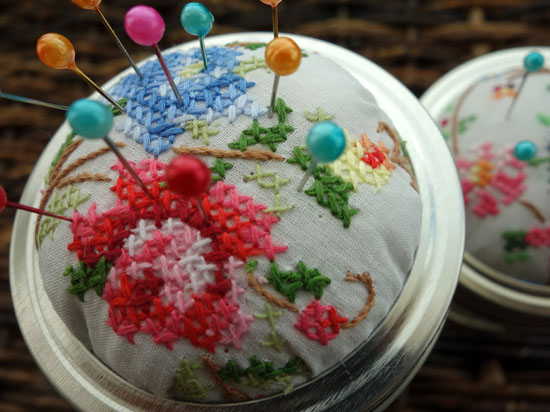
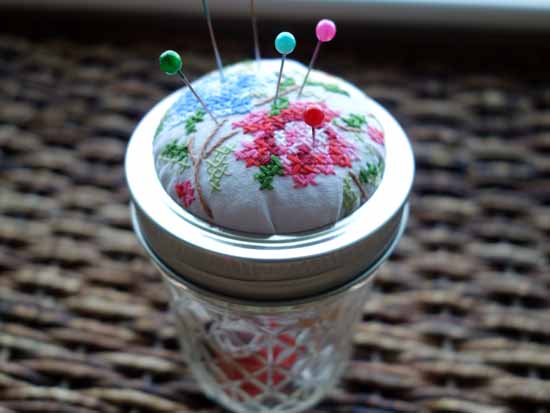
So this last time, I decided I would stop the madness and make a small sewing kit for myself. I wanted something that was small and could fit in my desk. But it needed to be large enough to hold all my small sewing materials. So I made this cute sewing kit out of a jelly canning jar and a handkerchief. The best part of the craft is that the top also functions as my pin cushion.
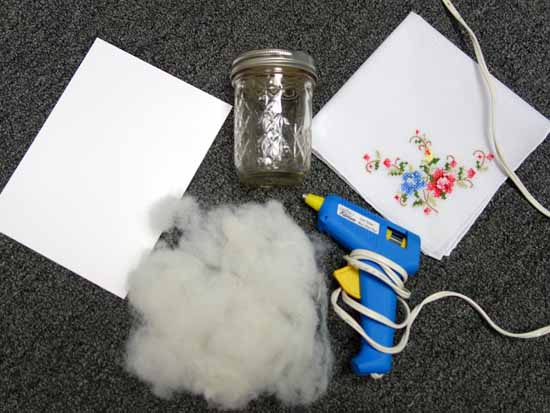
The materials for this craft include an embroidered handkerchief, small jelly canning jar, hot glue, cotton/poly filling, scissors and card stock.
 First you will want to unscrew the small canning jar. A canning jar is made out of three different components; the glass jar, the metal lid and the metal screw band.

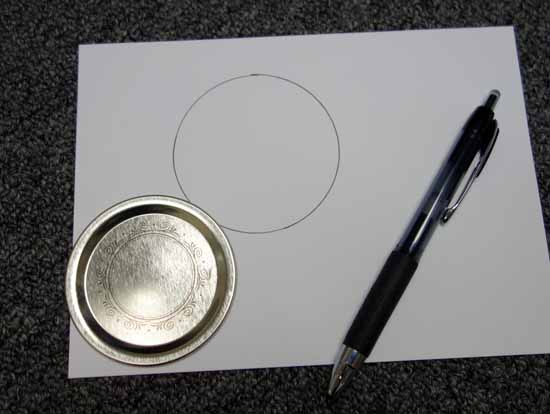
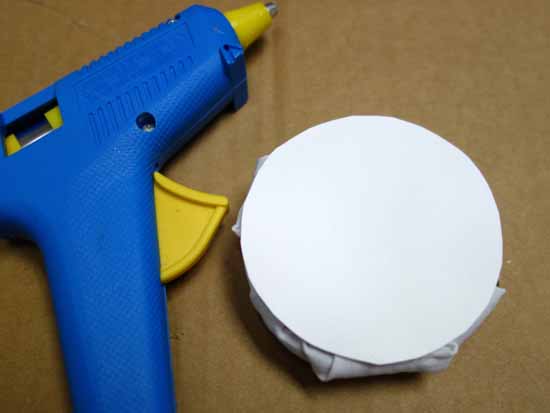
Take the top of the canning jar (metal lid) and trace around it on a piece of the card stock. You will use it as a pattern that you will then cut out with scissors.
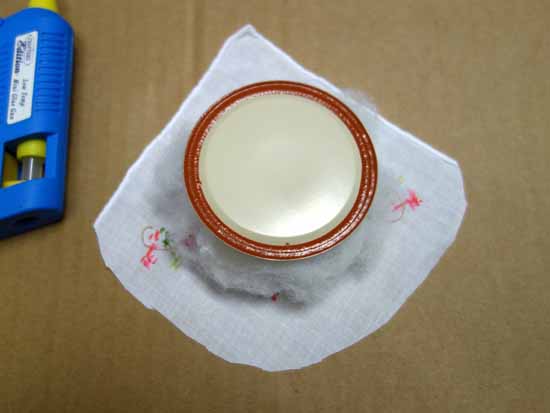
Now take a small handful of poly filling and “ball” it into the size of the jar lid. Make it extra dense to make a fuller pin cushion.

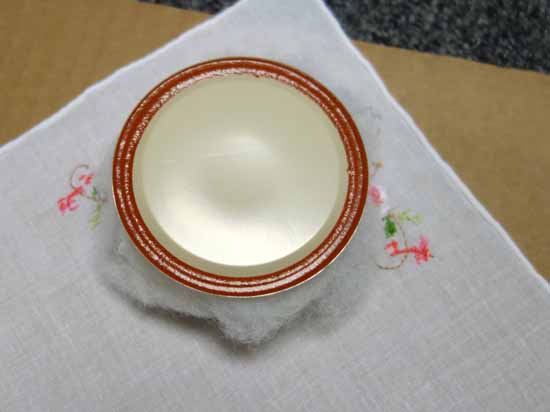
Place your handkerchief upside down (the back of the handkerchief should be facing up). Place the poly filling and the jar lid on top of the handkerchief. The bottom of the jar lid should face you.
For easier crafting, cut some of the excess handkerchief fabric away.
Now hot glue the handkerchief to the top of the canning jar. Be sure to pull tight and not glue too close to the edge of the jar lid and trim off the excess hankie. This is because if the edge of the jar lid is too thick, it will be harder to screw the metal band back onto the jar later.

Hot glue the cut circle onto the back of the lid. This will create a nice clean look, when the pin cushion is open.
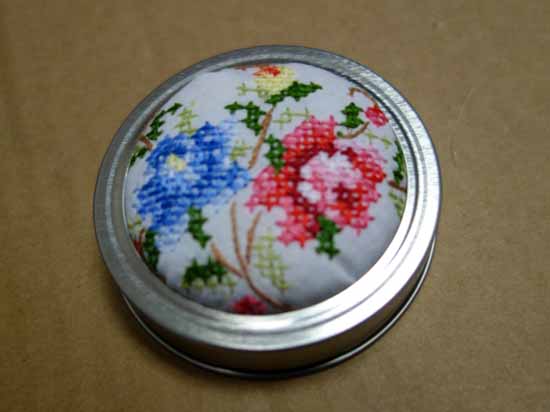
Push the top of the jar lid into the jar screw band.
Fill the canning jar with your sewing tools. I filled mine with straight pins, needles, a needle threader, a small pair of scissors, a tape measure, thread and thimbles.
Adorable, right? Loved how it turned out, so I created another for all my straight pins.
Love hankie pin cushions or want to make another type of hankypin cushion? The instructions can be found here.


i love the hankie pincushion thank you.