

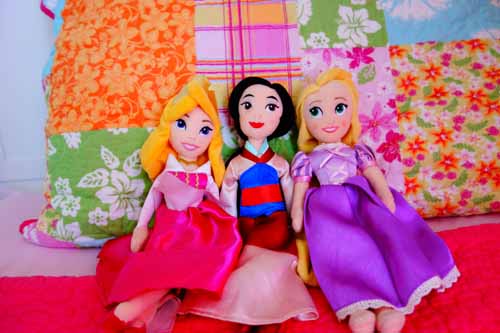
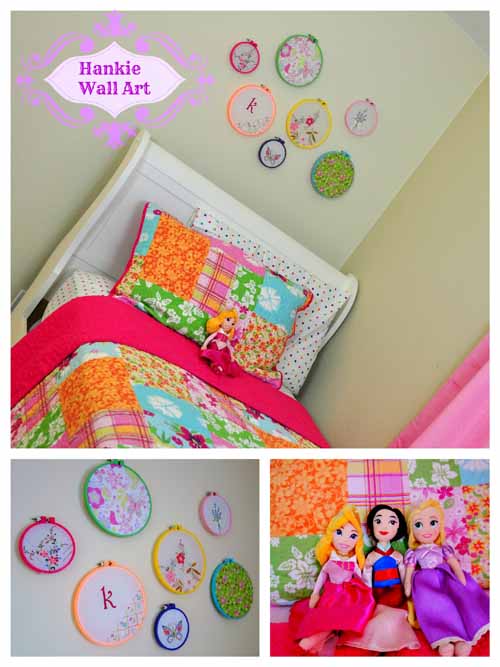
Though we’ve been in our house for quite awhile now, I haven’t had much time to decorate until recently. One of the first projects I tackled was my daughter’s room. The goal of this room was to create a space where she could dream and play and be the little princess that she is. Since she loves the colors pink and purple, I knew I had to incorporate those colors around her room. And I decided to do this by keeping her room pretty neutral, but adding her favorite colors through her wall art, furniture and bedspread.
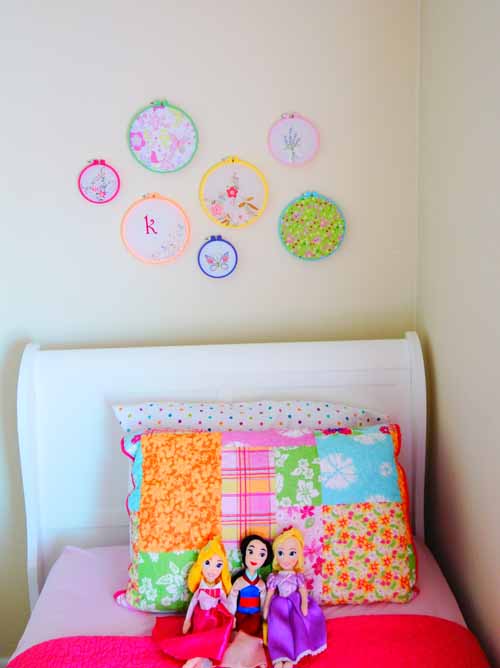
Though my daughter begged me for a Disney princess bedspread, I picked one that I thought would last the test of time. I love the Hawaiian inspired bedspread that I picked because not only is it mainly pink but it also contains lots of other bright and vibrant colors.
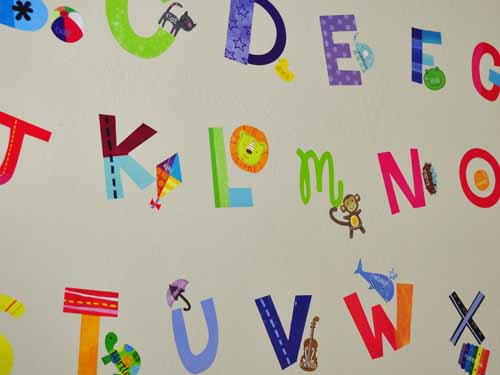
One thing that I kept in her room from her toddler days is the alphabet wall that I created using wall decals. What is great about wall decals is that they are inexpensive and can be easily removed once you are ready for a change. I love this alphabet wall, because not only is it cute and colorful but it is educational too.
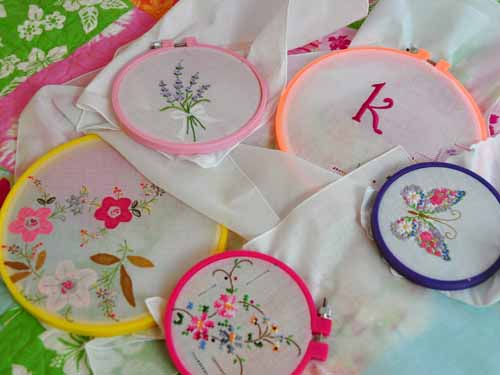
The thing that I absolutely adore is the handkerchief wall art that I made above her bed. This cute wall art is made with womens hankies and embroidery hoops. I also love that it required no sewing and is super easy to make. I think I threw it together in less than 30 minutes.
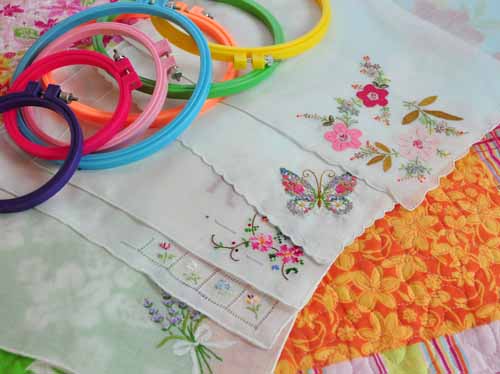
As you can imagine, I love handkerchiefs. I not only use them daily but I also decorate with them quite frequently. Handkerchiefs are great for DIY projects and crafts because they are colorful and super affordable, which my husband loves. You can purchase and find a wide selection of handkerchiefs here. This craft can also be made with colorful fabric instead.
The other main ingredient to this craft is the pastel embroidery hoops that I found at Joann’s Fabric. I have also seen them at Michaels so I’m guessing they can be found pretty easily. Since it’s been years since I’ve done hand embroidery, I was more than pleasantly surprised when I found these. I thought embroidery hoops only came in wood. I used three different hoops sizes for this craft, 7″, 5″ and 4″.
So the first step to this craft is to pick your handkerchiefs. I picked them to match the bedspread. Since I love personalized items, I also embroidered one hankie with her initial in hot pink.
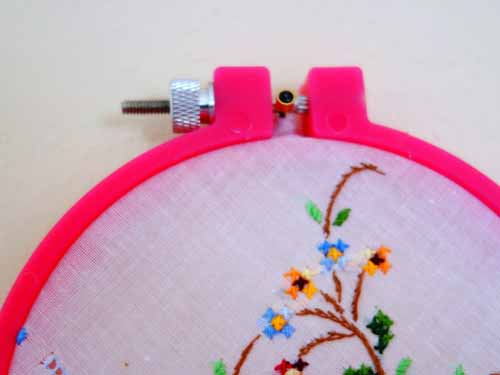
Once the hankies have been picked, you will then need to decide which hankie goes to which pastel embroidery hoop. Then it’s just about hooping each hankie into the hoop. If you’ve never hooped something before, it’s fairly simple. All you do is lay each hankie face up onto the inner hoop (the one with no screws). Then place the outer hoop on top of the inner hoop and press down firmly. Be sure to keep all the screws pointing to the top for a consistent look. After you have hooped each handkerchief, you will finish by pulling the fabric tight. Then trim all but half an inch of excess fabric off around the hoop. I actually cut mine a little too close. If I were to do it again, I would leave more excess and then tape or glue the edges down for a cleaner look. Mine looks fine but it’s not as clean as I like.

After all the hoops are ready and you are ready to hang up your art, I would recommend laying out the design first on a flat surface. Believe me, this will save you time and aggravation on having to do things over and over until you get the look right. Plus you won’t have any unnecessary holes in your drywall trying find the right look. So once you are ready to hang up the art, it’s just a matter of adding a small nail to the wall and then placing the embroidery hoop on top. There is no need to add a wire or anything to the embroidery hoop as there is a natural hole by where the screw is. Just hang your nail head in this hole.
I’m quite happy with the finished look, but most importantly my daughter loves her new room.
If you want to make your own hankie wall art.
Craft Material List
7 x Ladies Hankies {Bumblebee Linens}
4 x 7″ Embroidery Hoops {Michael’s Craft Store}
1 x 5″ Embroidery Hoops {Michael’s Craft Store}
2 x 4″ Embroidery Hoops {Michael’s Craft Store}
Scissors
Glue (Optional)
Editor’s Note: Recently, Redfin reached out to us and other experts from Duncan, BC, to Philadelphia, PA, for our room essentials to add a touch of holiday cheer to your guest room and create a stylish and functional space for your visitors. Check out other dreamy guest bedroom decorating ideas.


On your hanky hoops wall art. You can also hang them with 3-M’s hooks. They go up easy and come down easy without making any holes in your wall. They also come in many different sizes so I am sure there is one there to suit everyone.