
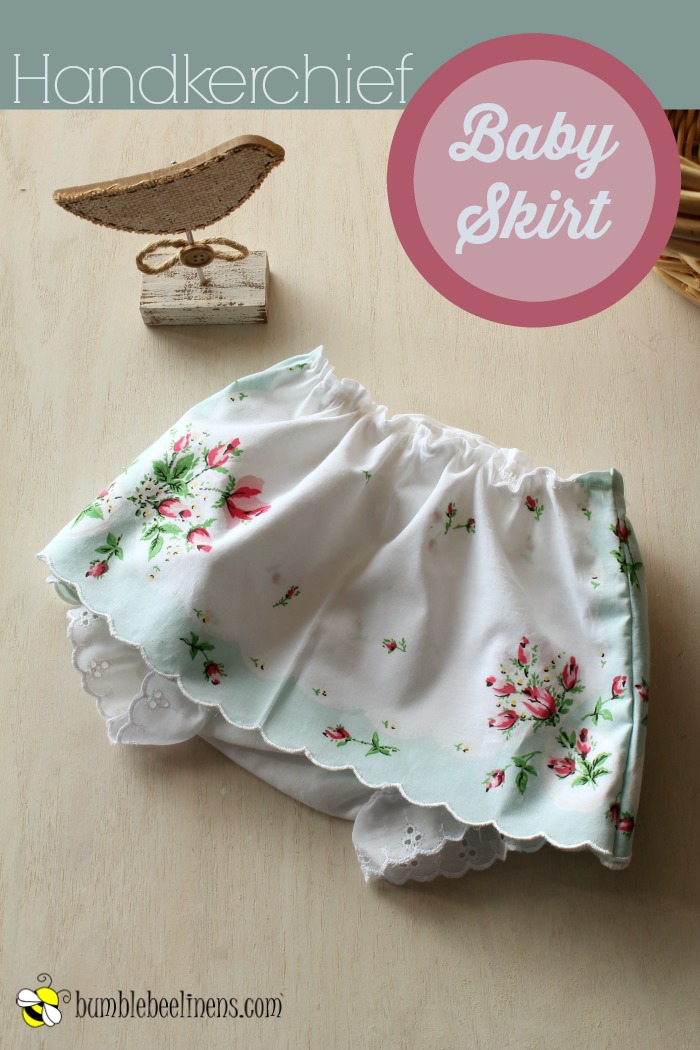
You can make this adorable Handkerchief Baby Skirt in less than 30 minutes. It only takes a straight stitch on your sewing machine to turn out such a cute giftable craft!
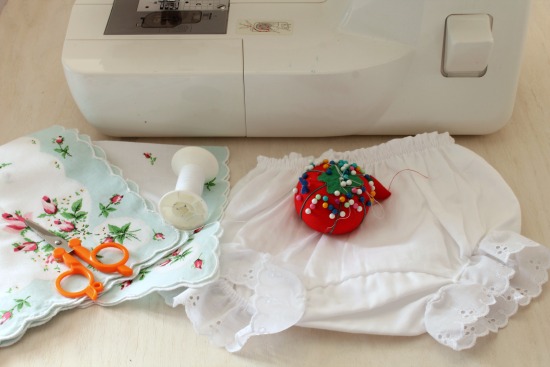
Supplies
- Infant bloomers (I bought these at the craft store)
- Two identical handkerchiefs
- Scissors
- Pins
- Thread
- Sewing Machine
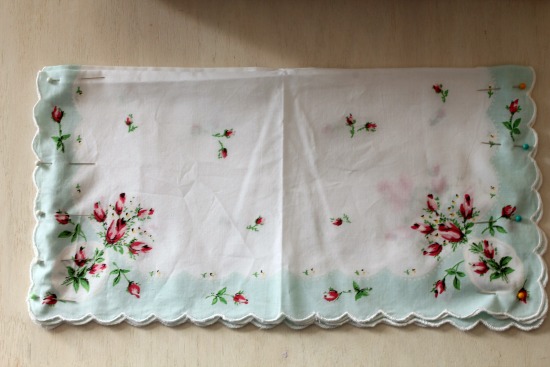
Fold the handkerchiefs in half with right sides facing out.
Lay the handkerchiefs on top of each other with the folded (straight) edges matching. The folded edge will be the top of the skirt.
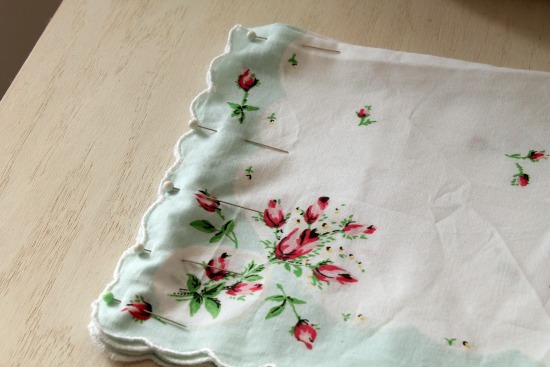
Pin the short ends of the handkerchiefs together. This will be four layers of fabric pinned together on the edge.
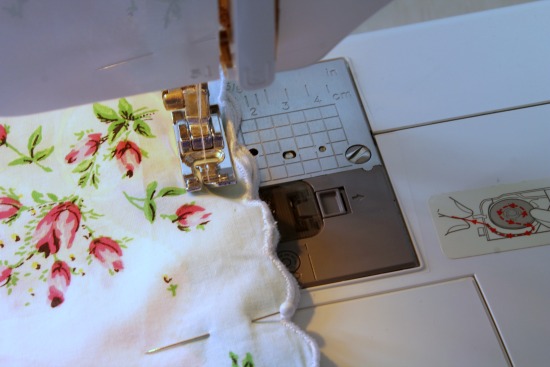
Sew a straight stitch along both short ends where the handkerchiefs are pinned together. You’ll want to sew about 1/3 inch in from the edge. Be sure to sew far enough in so that you can sew a straight line even considering any fancy or scalloped edges. Only sew on those two ends and leave the long sides open.
Trim excess thread from the beginning and ending of the stitches on both sides.
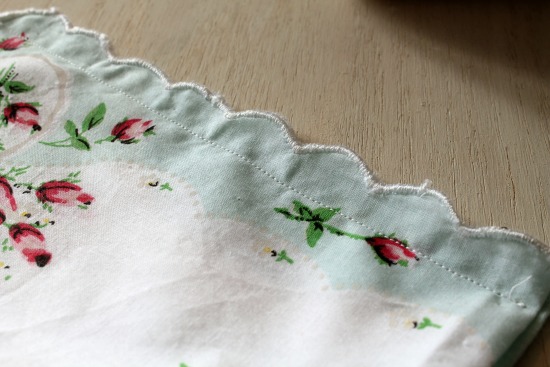
If you trim off the finished edges of the handkerchief, it would only leave fabric to unravel so I think it works better to just leave it intact.
This part is tricky to explain so follow me here.
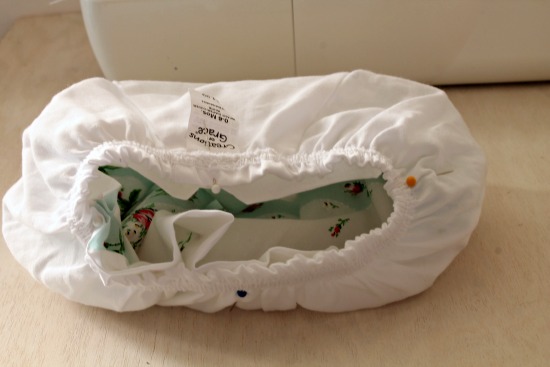
Turn the skirt inside out.
Turn the bloomers inside out.
Place the skirt inside the bloomers and line up the top edges.
This will leave the wrong side of the skirt (where the seam is) up against the right side of the bloomers. In other words, you’ll see the inside of the bloomers on the outside and when you look into the bloomers you’ll see the right side of the skirt on the very inside.
Now line up the skirt seams with the sides of the bloomers. You might need to stretch out the bloomers a little since there might not be a seam exactly on the sides. Pin the seams of the skirt to the sides of the bloomers on the outside (wrong side) of the bloomers. Make sure that the handkerchief folded edge is lined up with the top edge of the bloomers.
Now use another pin to attach the front of the skirt (the front handkerchief, about halfway between the seams) to the front of the bloomers. This will be a little tricky because the bloomer are gathered. So you need to stretch the elastic edge of the bloomers to make the skirt fit.
Repeat to pin the back handkerchief (halfway between the seams) to the back of the bloomers.
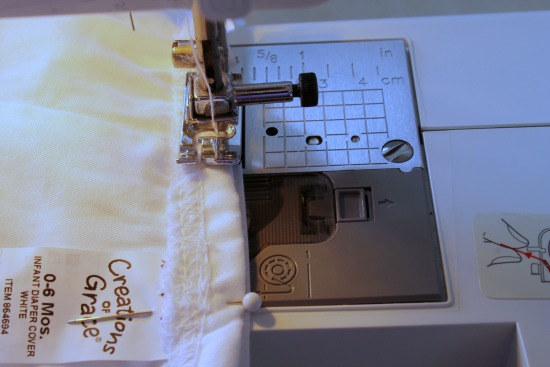
Use your sewing machine to straight stitch along the very top where the skirt meets up with the bloomers. You’ll have to stretch out the bloomers so they lay flat as you sew. This will allow the skirt to gather up when the elastic is at rest again. Make sure to begin and finish with a back stitch.
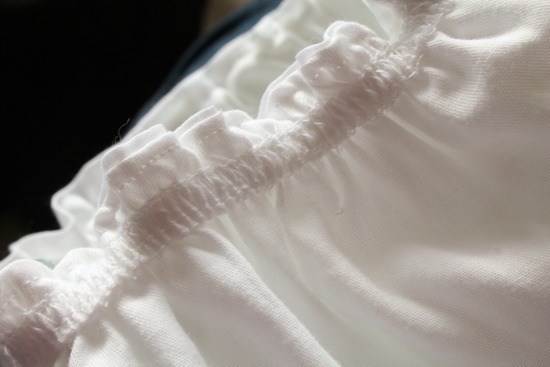
Use caution to remove the pins as you work and avoid stitching through the elastic. Sewing through elastic will prevent it from functioning correctly.
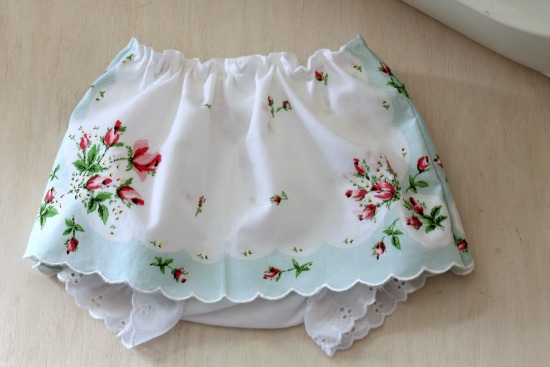
Trim away excess thread and turn the skirt and bloomers right side out. This is a great gift for special baby portraits or to wear over your favorite onesie.


