
Easter is a great time to celebrate with family and friends. Every year, we have my niece and nephews over to dye Easter eggs with my kids. The kids have a blast!
While the kids are dying eggs, the dads set up the Easter egg hunt. They hide plastic Easter eggs all around the backyard, in some very obvious places and some not so obvious places. In fact, last year my daughter found an egg from the previous year. Wouldn’t have even known it except the treat gave it away. It was from the year before. Thank goodness we don’t do candy treats in my house because I can’t even imagine what a candied treat would look like after a year exposed to the elements. Yuck! Sorry, I digress, the Easter egg hunt is actually one of my favorite parts of the day. I just love watching the kid’s faces light up when they find an egg and the laughter in the air while searching is just infectious.
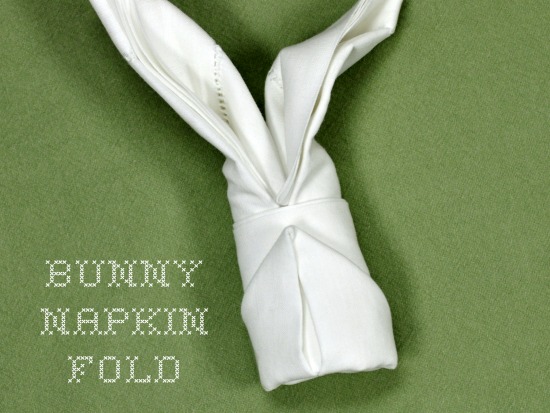
Lastly, after a wonderful day of celebrating we all sit down for an Easter dinner at my house. To make the dinner memorable, I always try to decorate my Easter table in a fun fashion. One of the things I like doing is folding our dinner napkins into a bunny napkin fold. The kids absolutely love these little bunny napkins, plus it is something you can easily do too!
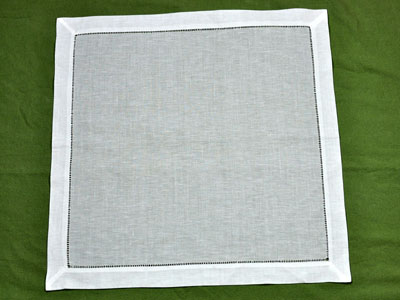
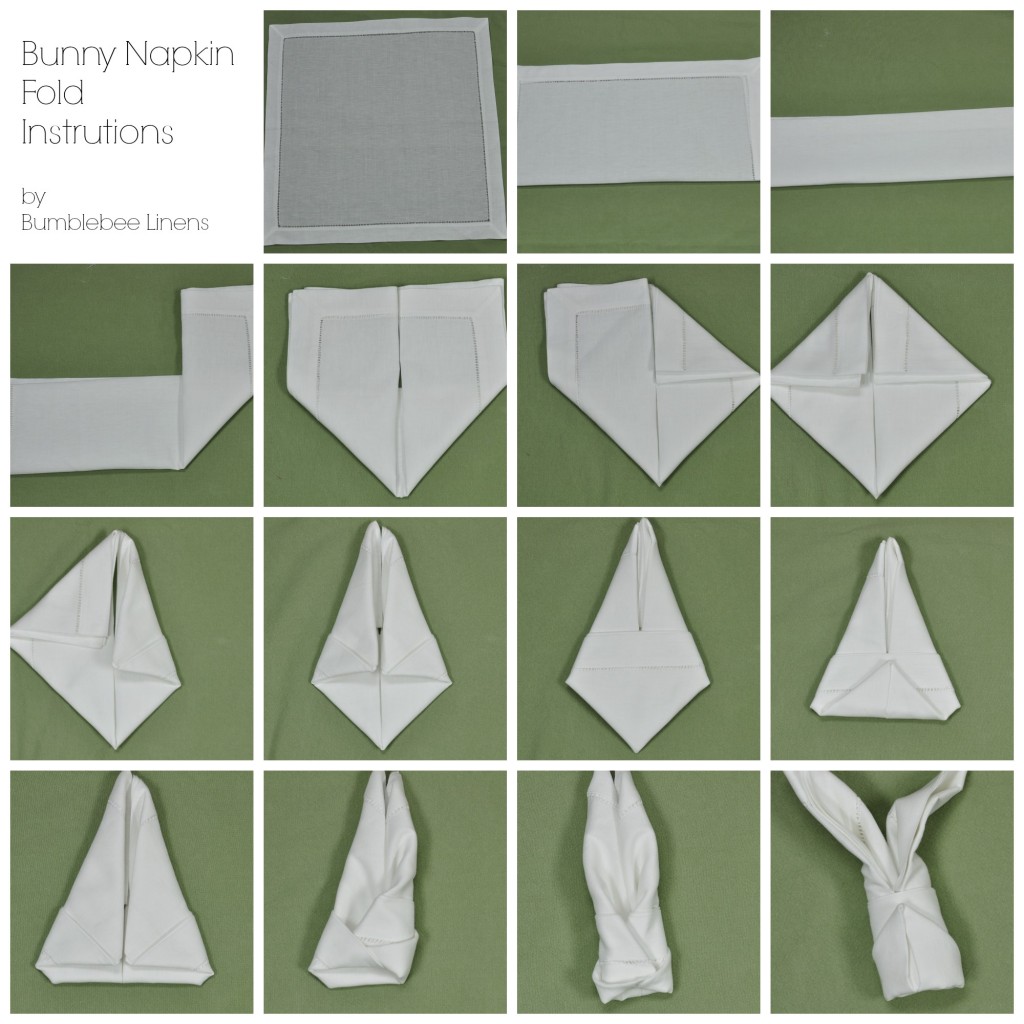
All you need is a square napkin for each place setting. The best place for square napkins, of course, is Bumblebee Linens!
Step 1: Iron the dinner napkin flat. You don’t always have to iron these napkins first, but doing so can often help make folds easier!
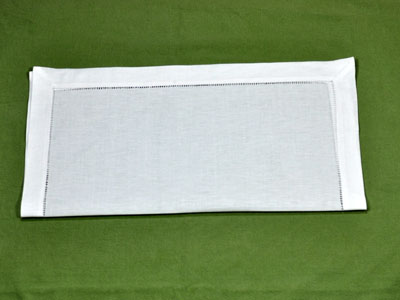
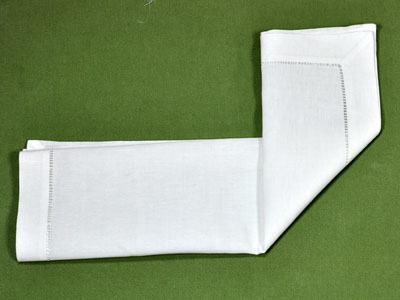
Step 2: Fold the dinner napkin in half. Have the opening be at the top.
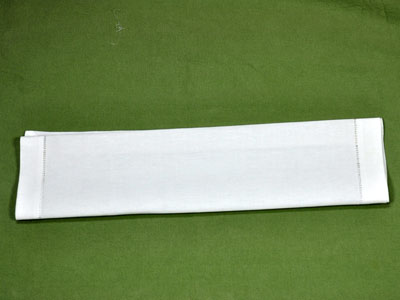
Step 3: Repeat this once more, this time in half from the bottom to the top. It should now look like a narrow rectangle.
Step 4: Continue by folding the right hand corner up at the center.
Step 5: Repeat with the left side up to meet in the center as well. There should now be a point at the bottom.
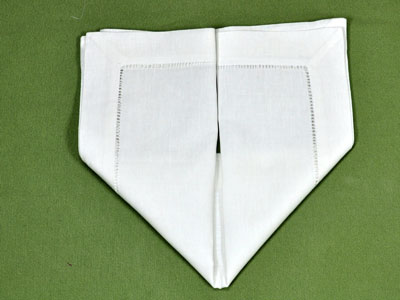
Step 6: Fold the right corner down to the center.
Step 7: Repeat with the left hand corner down to meet in the center. The napkin should now resemble a square.

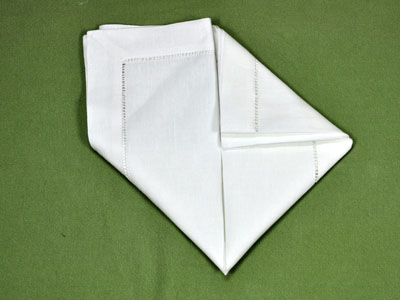
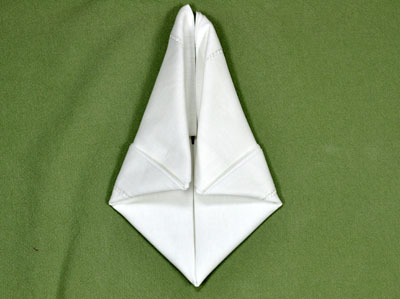
Step 8: Now take the right hand corner and fold it toward the center line. This is when the bunny ears will start taking shape.
Step 9: Repeat with the left hand napkin corner. Do you see the bunny’s ears?
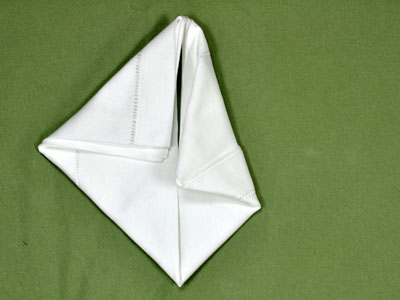
Step 10: Flip the napkin over.
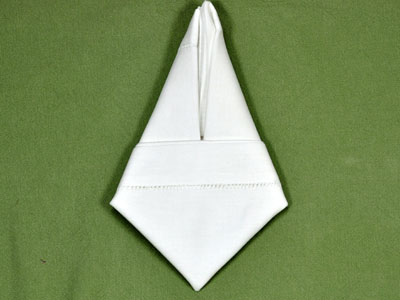
Step 11: Fold the bottom of the napkin up and towards the center line.
Step 12: Turn the napkin over again
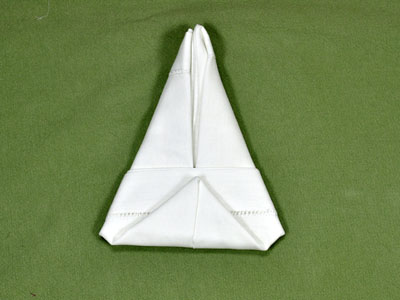
Step 13: Fold the right hand bottom corner over and tuck it into the small created triangle pocket.
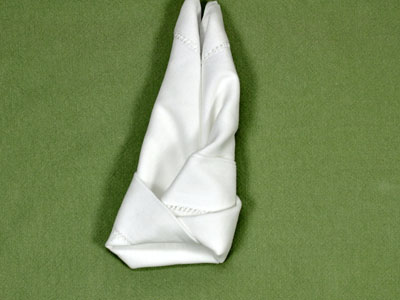
Step 14: Repeat with the left hand bottom corner. This one is a bit trickier so you may want to press down to keep the fold in place after you are done. 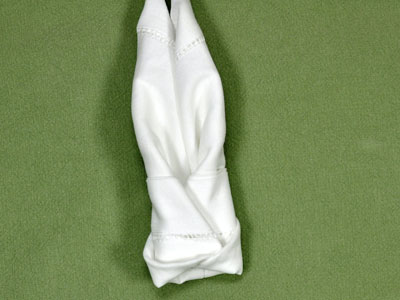
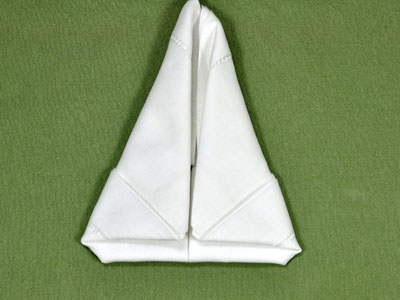
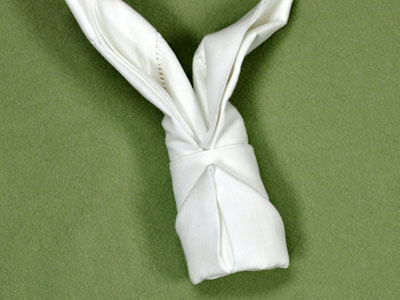
Step 15: Flip the napkin over and fold down the ears. Voila, one finished bunny napkin!
Click here for some other great napkin folding instructions.


