
One of the best things about our business is that we constantly get emails from our customers inquiring about how to make a certain hankie craft or sewing project. Often we already have the hanky craft already available to our customers but sometimes we don’t. This is one that we didn’t.
Susan from Pennsylvania contacted me a month ago and wrote “Jennifer, thank you so much for providing excellent craft tutorials. I made your hankie bunny last Easter and it turned out GREAT! This year, I would like to make a Spring hankie wreath to match. Any suggestions?” After giving it some thought, I came up with these easy to follow instructions. No stitches or embroidery machine required! You won’t use a single needle–just your own two hands.
Hope you enjoy it!
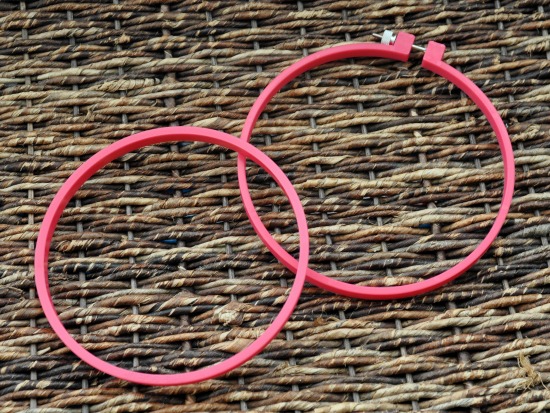
The materials for the handkerchief wreath are one 6″ embroidery hoop, 15 coordinating ladies handkerchiefs, 15 small rubber bands (I “stole” my daughter’s rainbow loom rubber bands) and 5/8″ ribbon (approximately 4 feet long).
First you are going to separate the embroidery hoop into two separate pieces. For this craft we are only using the hoop that does not have the metal bracket on it. We will save the other side for a different craft (hopefully coming soon).
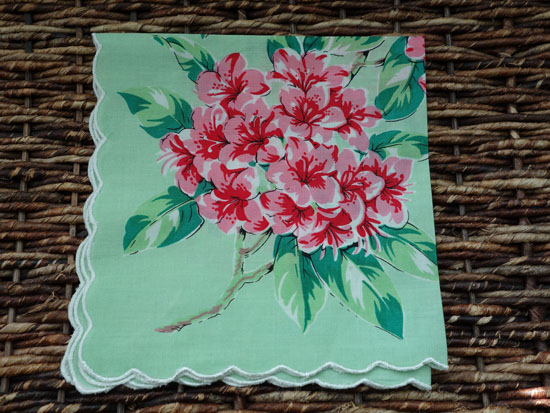
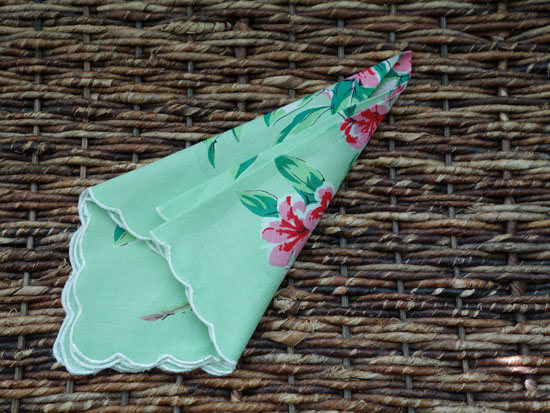
Next you are going to fold one of the handkerchiefs into fourths. Orient the hankie so that the “center” of the hankie is facing the top right.
(Optional step: Before folding each handkerchief into fourths, starch and iron your handkerchiefs. A stiffer handkerchief will hang a little better, especially at the top of the hanky wreath. Pay attention to your material–cotton, linen, silk, and satin all iron differently.)
Next you will take the top left corner of the hankie and fold it diagonally down to meet roughly in the center.
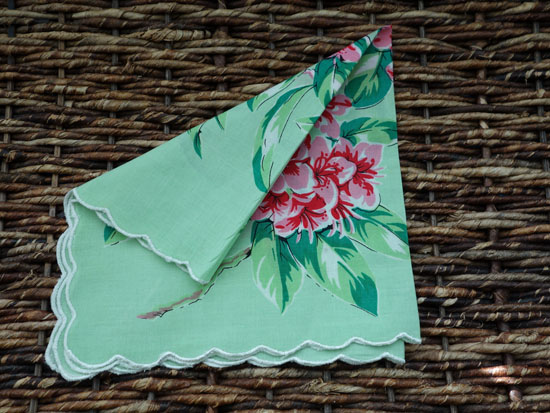
Take the bottom right corner of the hanky and diagonally fold it up to meet approximately in the center also. The sides will overlap slightly.
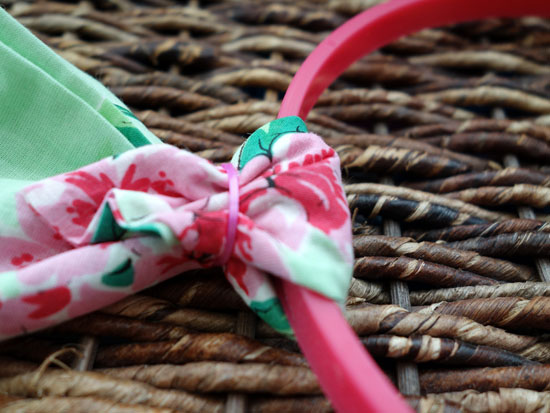
You are now going to attach the handkerchief to the hoop. Lay the hoop on top of your handkerchief (approximately 1/3 of the way down from the point)
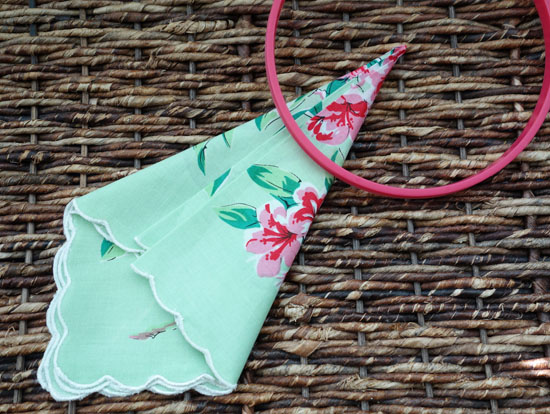
Fold the point over and around the hoop.
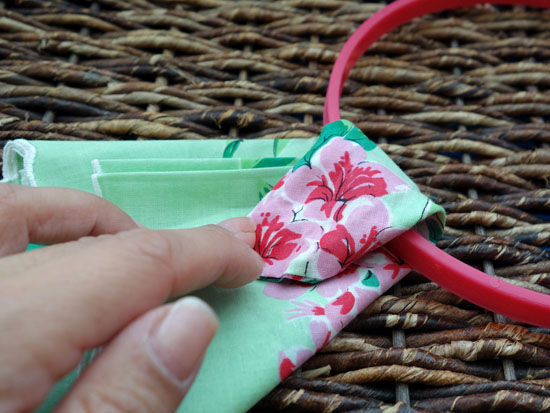
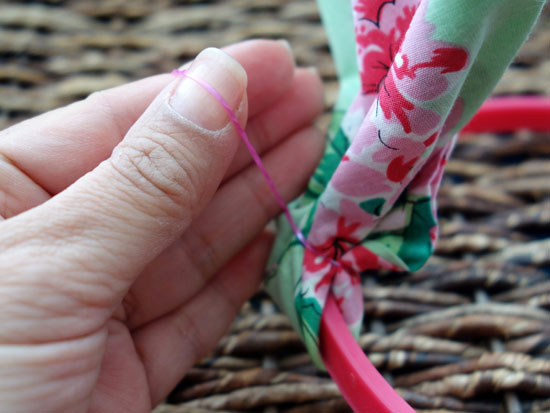
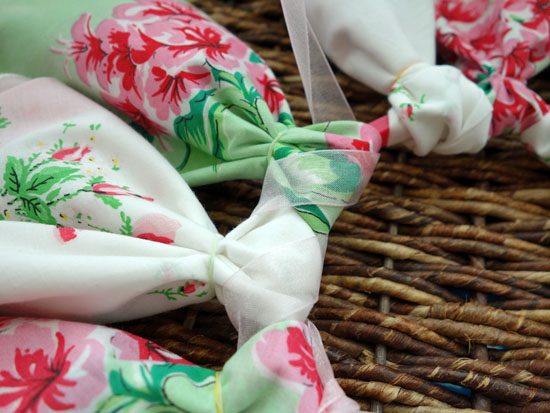
Use one of the small rubber bands to wrap around both sides of the handkerchief. I looped the handkerchief twice but depending on your rubber band size, you may need to loop it around multiple times.
If done correctly, it should look like this.
Repeat the above steps with the next handkerchief.
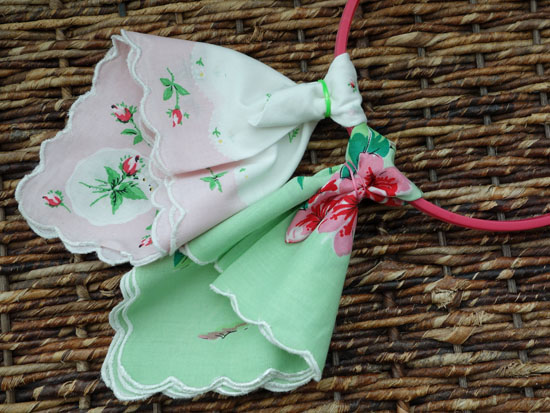
And then comes the next handkerchief…
Continue to repeat the above steps on all the remaining handkerchiefs. In my case, I’m alternating between the two different handkerchiefs that I’m using for this craft.
(Editor’s note: You do not have to use the same handkerchiefs. You can mix and match depending on your tastes)
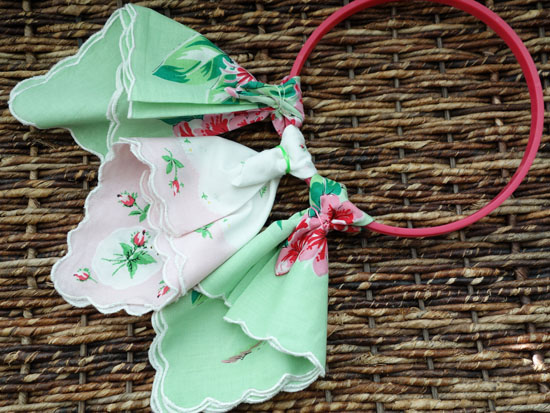
Repeat until all the handkerchiefs have been used. Flip over the hanky wreath.
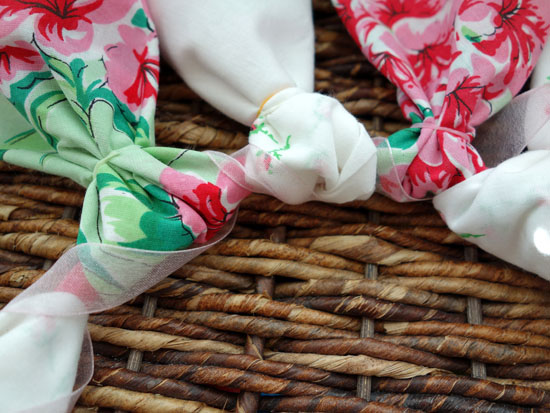
Finish the handkerchief wreath with ribbon. The ribbon will fill in the gaps between the hankies on the wreath and also add a nice finishing touch.
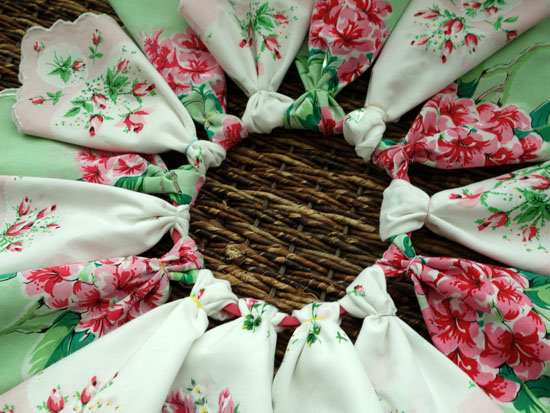
First you are going to take a coordinating ribbon and tie it around one of the hankies, leaving approximately a one foot ribbon tail.
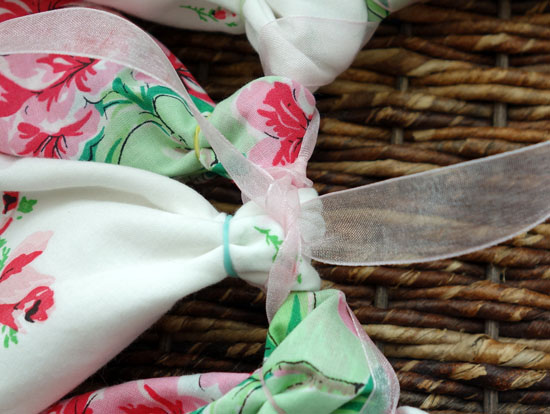
Next you are going to wind the ribbon around and in between each of the hankys.
Once you have finished winding the ribbon around the entire wreath, tie off the ribbon where you started and then tie a bow. Trim the ribbon tails to your desired length.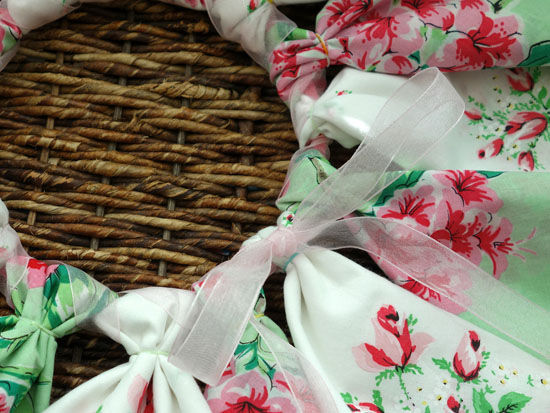
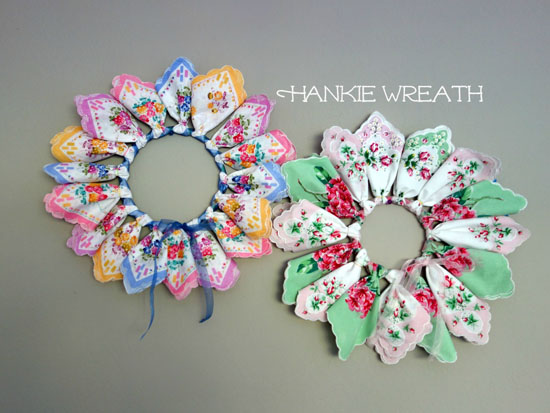
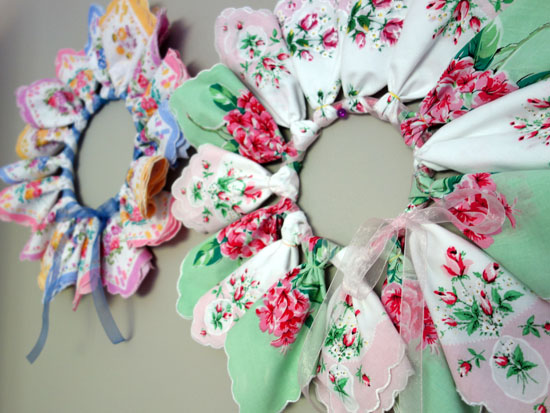
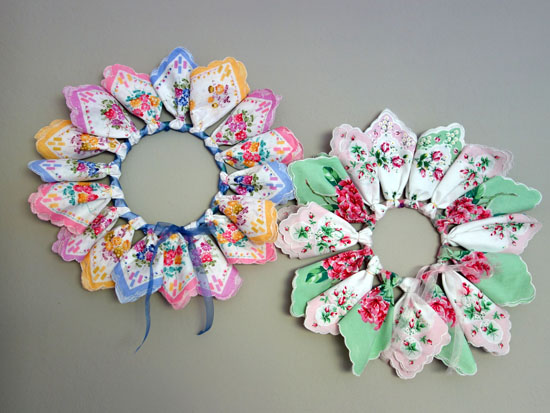
Voila! Isn’t this spring hankie wreath lovely?
(Editor’s note: I also made a larger wreath, using an 8″ embroidery hoop. For this wreath I used 17 handkerchiefs and made the handkerchiefs a little more compact by placing the folded hankie a little farther down underneath the embroidery hoop- step 4)
Craft Materials
15 vintage inspired hankies {Bumblebee Linens}
15 small rubber bands
1 6″ embroidery hoop {Michaels}
4 feet ribbon (5/8″ thick)


I love the vintage hankie wreath
How do you keep the top hankies from drooping when you hang the wreath?
Thanks
I slightly starched my hankies before making the craft but you can also hand “sew” the hankies together in the back with a simple running stitch.
This is absolutely adorable but I think my husband would kill me if I spent $120 on 15 hankies
When my mother passed a away a few years ago, I received her hankies and made a wreath, small pillow cover as well as a small table runner using her hankies. Keepsakes that I can pass onto my 2 daughters later on. Right now I’m collecting hankies that I find at Antique Malls, etc for me to make a couple pillow cases.
I also have my mom’s hankie collection. I must have a couple hundred. I have many if my grandmother’s. I treasure them. I have a couple aprons made from hankies. They are cool. I never thought of making a pillowcase from them. They are so delicate. Thanks for the ideas.
I HAVE COLLECTED SO MANY VINTAGE HANDKERCHIEFS AND THEY JUST SIT IN A BOX AND EVERY ONCE AND AWHILE I TAKE THEM OUT AND LOOK AT THEM WHAT A LOVELY PROJECT TO DISPLAY THEM.
THANK YOU FOR YOUR CREATIVITY
I have a nice hanky collection and have been trying to find a clever way to desplay them. Love the wreath idea!
Pick them up at yard sales and thrift stores.
I love ? it❤️?
Love this idea but where can I find hankies nowadays
Loved this idea, I have all my grandmother handkerchiefs and I am 79 years old myself. I am going to make these for my daughters.
To stiffen the hankies you could youse one of the fabric stiffers avail in craft and fabric stores. They work really well.
This is a great idea. I can’t wait to try it. Thanks
Karen, it would still look cute with $12 worth of storebought red and blue hankies.
Thanks for the tutorial.
What a great idea. I can’t wait to make one. I love to make wreaths. Will this do ok outside too!
Can’t wait to get my book!
Beautiful thank you.
I can see using the “bandana” ones also! I know they are much bigger but you could cut them in four, then fold them . At least in mine mind it works. Hahah will have to try it out as I have a LOT of them (think quilt).
You can also add “body” to the hankies using iron on fusible interfacing. I have inherited several hankies and can usually find them at antique stores priced reasonably. Bandanas would also work and look great in any cowboy or cowgirl’s room or in red, white and blue for summer, Bandanas are bigger, so may have to be folded differently . Nice to see these reappearing to be enjoyed again. My Great Grandmother alway gave the gift of a hankie, small cologne and a small coin purse with a brand new penny inside,