Making a Linen Napkin Utensil Roll

Making a Linen Napkin Utensil Roll

Planning a picnic in the park? These lovely utensil rolls made from our White Hemstitched Linen Napkins are a cute way to organize your cutlery. Once the utensils are removed, the roll even doubles as a napkin!
Click Here And We'll Send You A Free Book Of Arts And Crafts


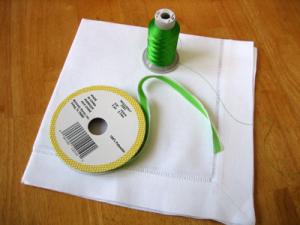
Materials

Materials Needed

Directions How To Make A Linen Napkin Utensil Roll

  1. Iron the napkin flat.
  2. To create the cutlery pockets, fold the napkin up seven to eight inches up from the bottom. Press with an iron.
  3. From the right hand side of the napkin, mark stitching lines every 2.5 inches along the napkin until you have enough pockets for all the utensils. Use pins to mark the positions of the stitching lines.
  4. Machine stitch the pockets by stitching a straight line from the crease of the napkin up to the hem along the pin/stitching lines. Note: For a decorative look, I like using an overcastting stitch in the same thread color as the ribbon. You can use either white or the same color bobbin thread underneath
  5. Repeat along all stitching lines.
  6. On the left hand side, fold the strip of ribbon in half and stick between the two napkin layers. Pin down before stitching the edges closed.
  7. Finish by machine stitching a straight line along both edges of the napkins.
  8. Roll the napkin and tie the ribbon around the picnic roll.
  9. Congratulations you are now ready for your picnic.
Figure1Figure 1
Figure2Figure 2
Figure3Figure 3
Figure4Figure 4
Figure5Figure 5
Figure6Figure 6
Figure7Figure 7
Final
Final

Shop Materials For This Craft

Click The "Spin" Button Below To Spin The Wheel

Spin

Canvas not supported, use another browser.