Making a Pillowcase Bag

Making a Pillowcase Bag

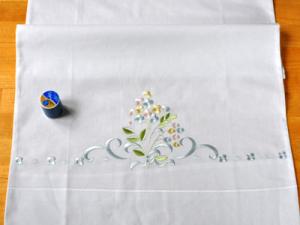
A fashionable way to carry your belongings! These lovely hand bags made from our Embroidered Pillowcases make excellent gifts and are a great way to show off your style. Make your handbag extra special by embroidering your initials on the front of the bag!

Click Here And We'll Send You A Free Book Of Arts And Crafts


Materials

Materials Needed

Directions How To Make A Pillowcase Bag

  1. From the pillowcase closed edge, measure down .25" and remove this amount by cutting if off.(Figure 1)
  2. Fold the pillowcase diagonally in half and press with an iron to create a crease.(Figure 2)
  3. Cut along the pressed crease. You now have two pillowcase halves.(Figure 3)
  4. Now hem along each diagonal pillowcase edge to avoid fraying. (Figure 4)
  5. Rotate one of the pillowcase halves and place it inside the other pillowcase by lining it up along the bottom edge. (Figure 5)
  6. Now where the pillowcase case diagonal edges overlap, pin and stitch the pieces together. Repeat on the back side of the bag. (Figure 6)
  7. Turn the bag inside out and machine stitch the bottom edges of the pillowcase pieces together. (Figure 7)
  8. Turn the bag inside out.
  9. Tie a knot at the top of the bag. (Figure 8)
  10. Congratulations you are now able to use your pillowcase bag.
Figure1Figure 1
Figure2Figure 2
Figure3Figure 3
Figure4Figure 4
Figure5Figure 5
Figure6Figure 6
Figure7Figure 7
Figure8Figure 8
Final
Final

Shop Materials For This Craft

Click The "Spin" Button Below To Spin The Wheel

Spin

Canvas not supported, use another browser.