
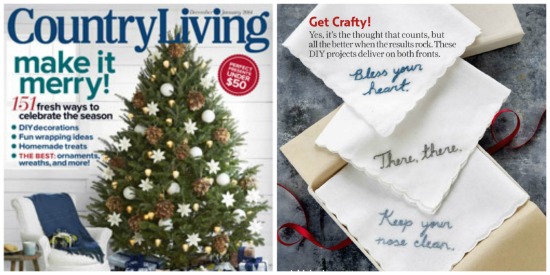
Late last year, one of our ladies handkerchiefs was featured in the popular lifestyle magazine, Country Living. Not only were we thrilled with being featured, we loved the craft idea that they came up with. The DIY craft idea was to hand embroider funny sayings onto handkerchiefs for your loved ones for Christmas.
Even though I’ve known how to hand embroider since I was a little girl, now that I machine embroider, it’s very rare for me to hand embroider anything. I love the look but it does take a lot more effort to do, which is why this article gave me the kick in the pants to make an embroidered handkerchief for my husband for our wedding anniversary.
Yes, I’ve given him plenty of personalized hankies over the years but nothing done by hand. What I wanted my gift to say is, I love you and I took extra time and effort to make this special for you and I think I accomplished that.
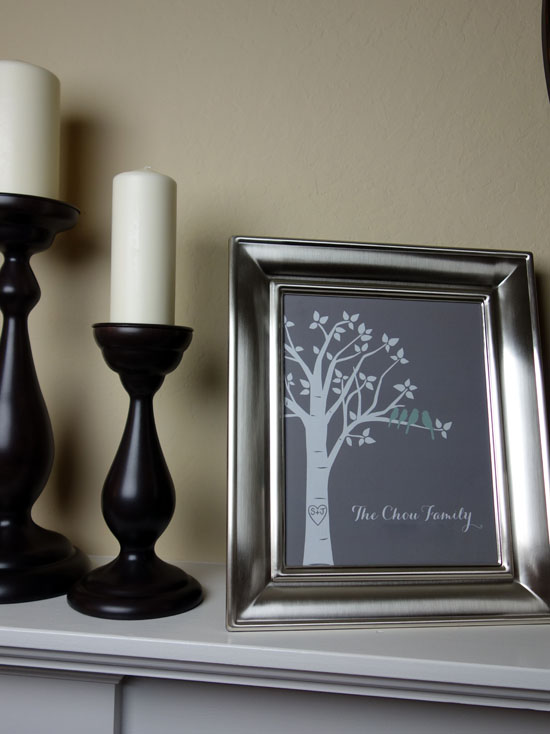
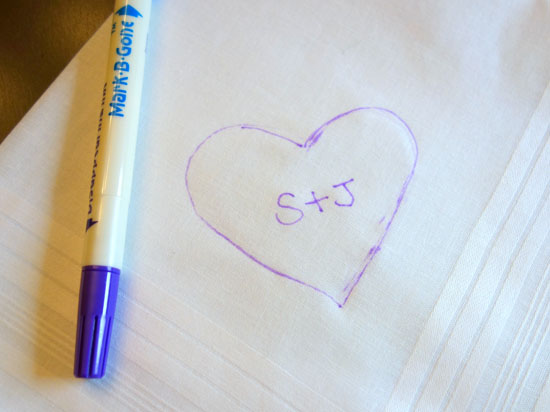
I was originally going to embroider the hankies with inside jokes but in the end I went with the tried and true, a heart with our initials inside. I know, a little cheesy but it suits us. Plus, this past Valentine’s Day my hubby surprised me with a framed picture of a tree with our initials.
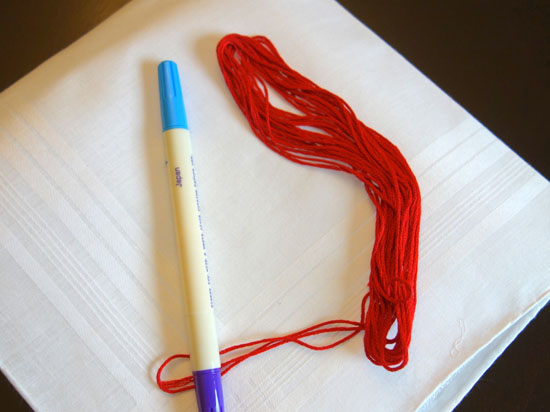
This craft requires very few materials. A men’s handkerchief, an erasable fabric marking pen or pencil, red embroidery floss and a needle.
Editor’s note: Using red thread does make the hankie look a little Valentiney (is that even a word?) but it’s the color my kids chose for their daddy. You may want to choose a different color for your main squeeze. In our linen business, most men choose black, dark blue or silver thread as their preferred color choice)
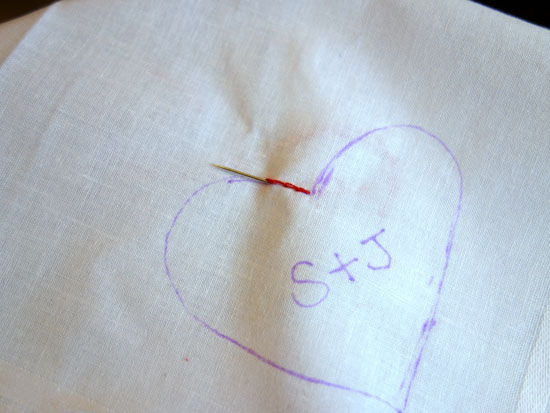
The first thing you need to do is iron your handkerchief. Then you will want to lightly draw your image onto the handkerchief with your fabric marking pen. Don’t worry if you make a mistake on your design. The great thing about fabric marking pens is that you can “erase” the ink with water once you are finished.
Once the image is in place, you are going to hand embroider over the design using a simple embroidery back stitch. For this craft, I stitched with two strands of red embroidery floss for a thicker look.
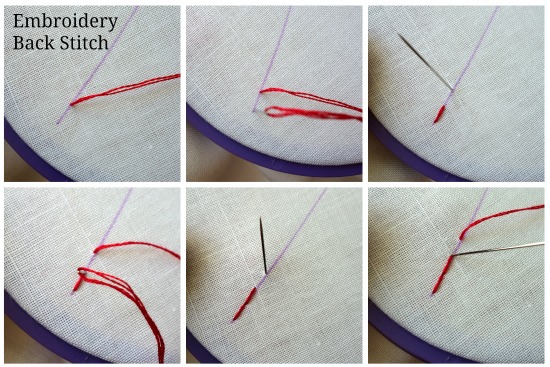
If you are unfamiliar with the back stitch, it’s very similar to a running stitch. The main difference between this stitch and a running stitch is that when you poke your needle back down again, you will poke it back to the end of your first stitch versus in front of it.
To start, you will first poke your threaded needle through the back of the fabric to the top. Once you pull the thread all the way through, you will want to poke the needle back down to create your first stitch.
On your second stitch, pull the needle through again but a little further than your first stitch. This time, when you create your second stitch instead of going forward again, you are going to create a “back stitch” by poking it back to the end of your first stitch.
For your third stitch, poke the needle through again but close to your second stitch and then back down to the end of your second stitch. Wow, can you say all of that three times fast? If done correctly, your stitch should look like one large line made of small tiny stitches.
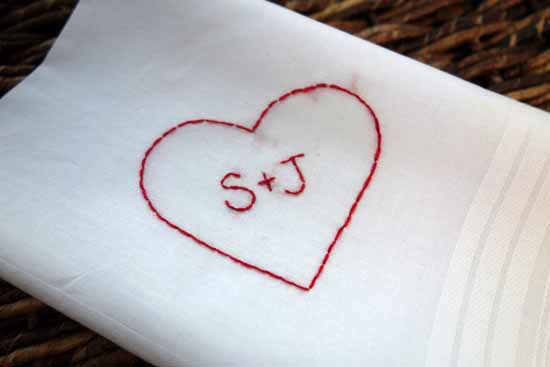
Once you’re done with the design, “erase” the marking pen’s ink by dabbing it with water. Finish by ironing your hankie. Present your hankie with a kiss. Hope your significant enjoys it as mine does.


This is awesome Jen! I was just wondering how to to this the other day. Do you have a hoop size you recommend?
Hi love the hanky already get news letter how do I gett the free ebook
Thanks Norma
I personally like smaller hoops since they are easier to use but any size should work. Just use a size slightly larger than your embroidery design. If it’s not a complex design, you can also go without. Hooping does make it easier however.
Please send me an email at bumblebeelinens at gmail.com
Jen, you two are such a cute couple. =) I’m always looking for personalized gifts for the husband. Thanks for sharing!
Jen, you two are such a cute couple. =) I’m always looking for gifts for the husband. Thanks for sharing.
How does the handkerchief look on the other side? Are there ways to minimize or hide knots and get a clean looking stitch on both sides?