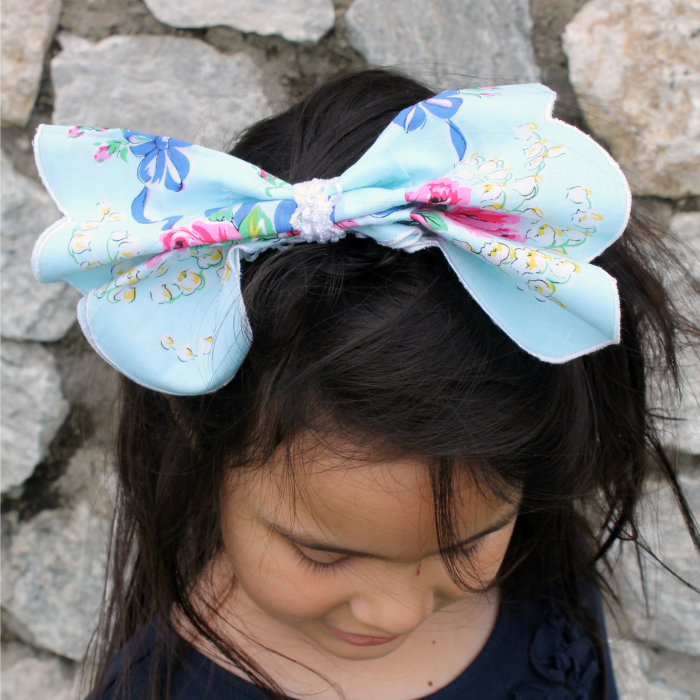
How cute is this easy to make Handkerchief Hair Bow! It’s a great summer craft and so beautiful to go with your favorite summer dress.
My daughter loves her big, fancy headband and you can make one for every day of the week. Pick a variety of printed handkerchiefs to make one for each of your favorite summer dresses!
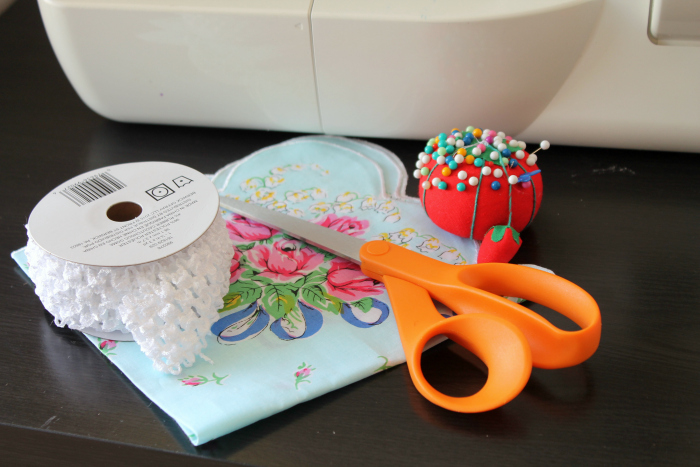
Supplies
- Stretchy Crochet Elastic Trim (for making Headbands)
- Printed Handkerchief
- Scissors
- Pins
- Sewing Machine
- Thread
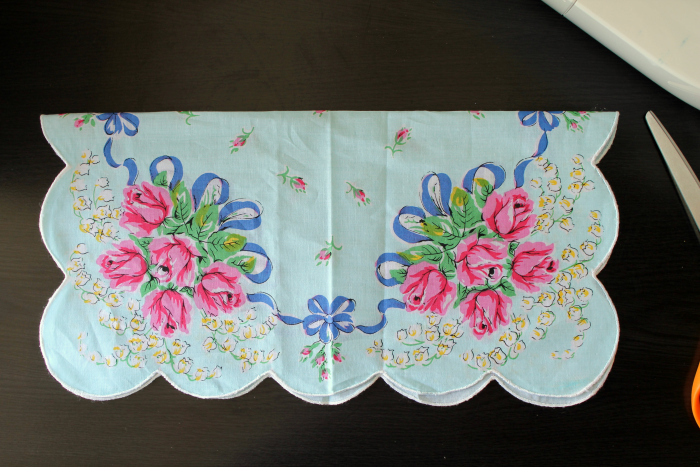
Fold the handkerchief in half.
Be careful to try to line up the scalloped edges.
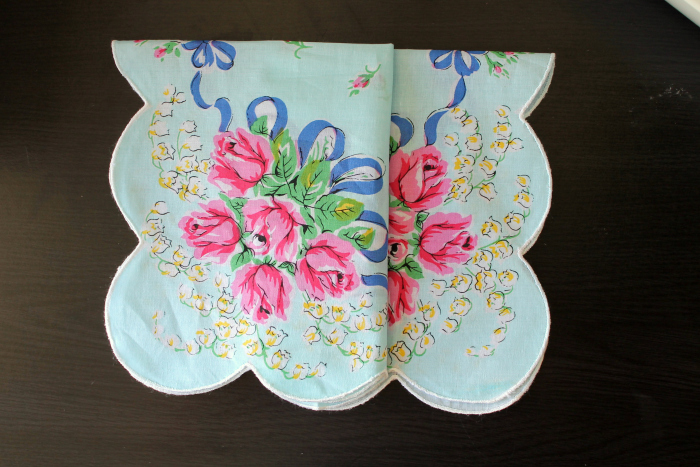
Fold the handkerchief over onto itself so that you only see three scalloped edges on the bottom. Basically you are folding 2/5 of the handkerchief onto the other 3/5 so that you only see 1/5 of the napkin still showing on the bottom. This might take a little while to line everything up correctly. It will look like the image above. You will want to pin the folded edges in half.
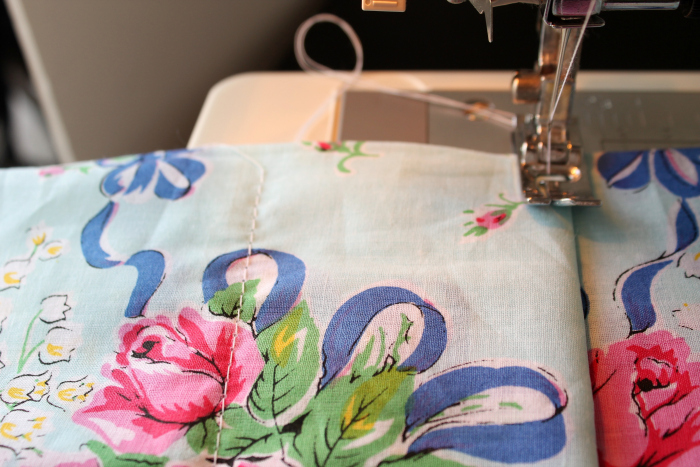
Use your sewing machine to stitch a long basting stitch along each folded edge. You’ll sew one on the front and one on the back of your folded handkerchief. This will hold all the folds in place.
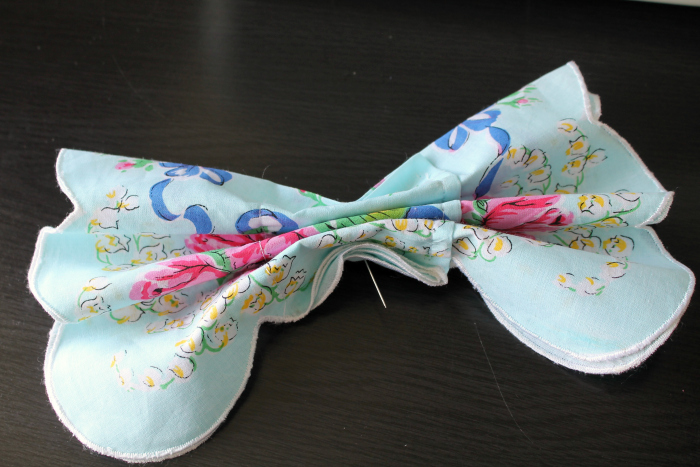
Fold the handkerchief into an accordion fold in the center area. Leave the outside edges loose.
You can use a pin to hold the accordion fold in place.
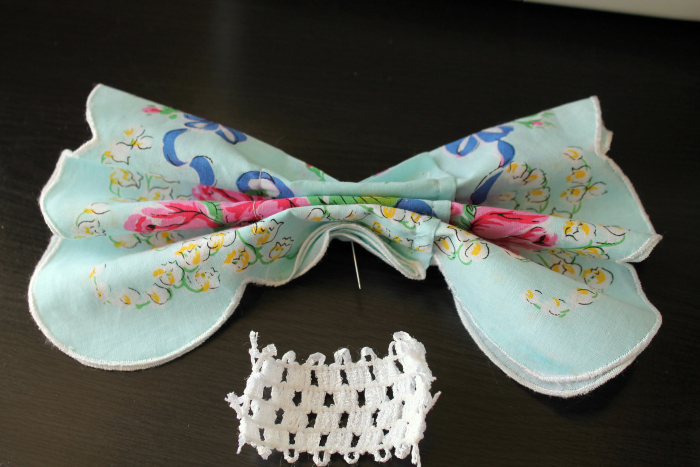
Cut a 2 inch length of the crocheted elastic trim.
Wrap the trim around the accordion folded handkerchief. Stretch it very tight and pin it in place.
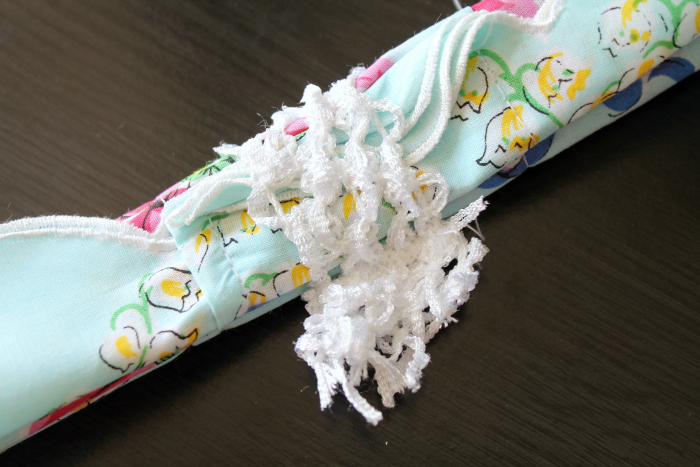
Use your sewing machine to stitch the elastic tightly in place with a zig zag stitch.
Trim away the excess crocheted trim for a finished, tightly bound bow. Now to attach the bow to the headband.
Cut a piece of elastic crocheted trim to the right length according to this chart (add 1/2 inch to each length for sewing it together):
- Age 0 – 6 months – 13 inches
- Age 6 months – 12 months – 14 inches
- Age 1 – 3 years – 15 – 17 inches
- Age 3 – 12 years – 17 – 18 inches
- Adult – 18 – 20 inches
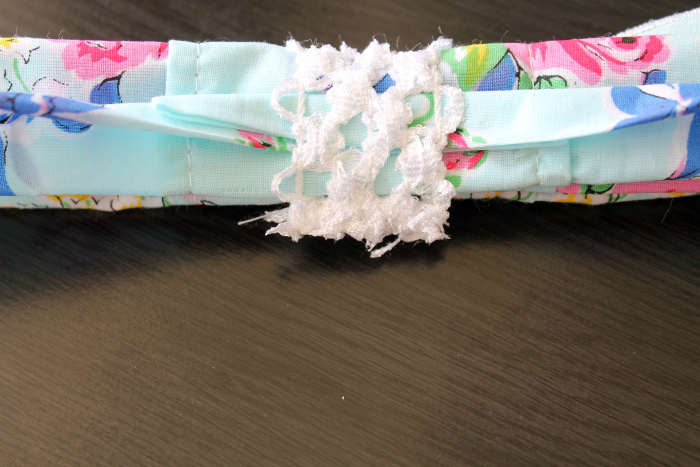
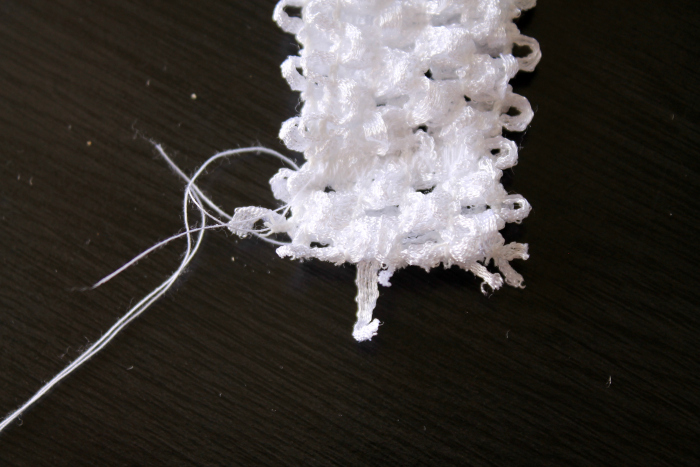
Push the crocheted trim through the trim that is holding the bow together. Then sew the headband trim together with a zig zag stitch.
Cut away any loose ends from the end.
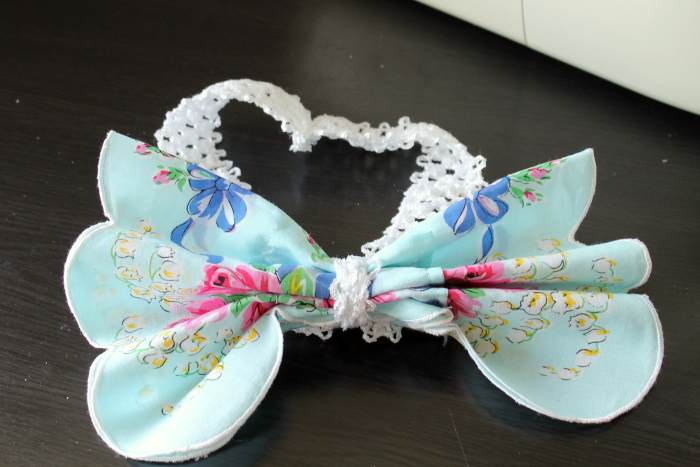
Fan out the sides of the handkerchief to create a big and beautiful bow.
If you like, you can apply a starch spray to the fabric to hold it more in it’s fanned out bow position. We like to leave this one big and floppy so it moves with the giggling of play and fun.