
 I love parties and I love throwing parties. One aspect of party planning that I love is picking out party favors for my guests. Party favors are reminders of the fun times that are had and a way to thank guests for coming over. Often it’s the little details of the party that stick out to guests.
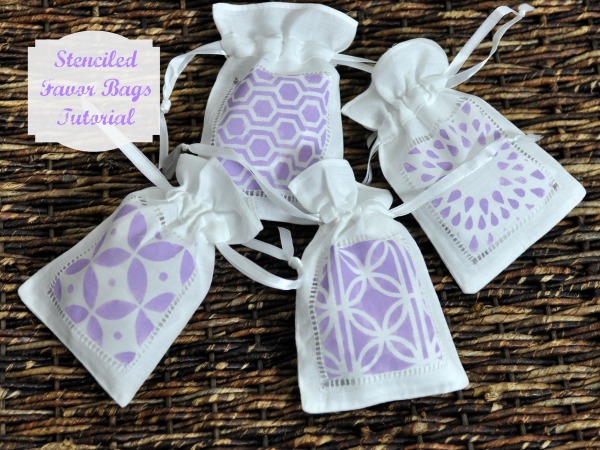
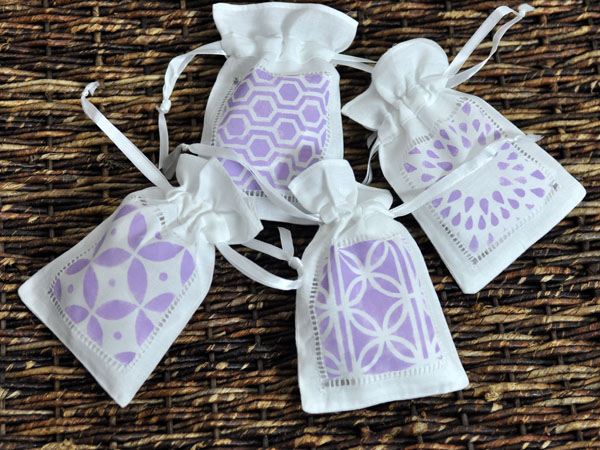
No matter what you choose as a party favor, be sure to present it in a cute way. One of the easiest and cutest way to present a small party favor is by using a favor bag.
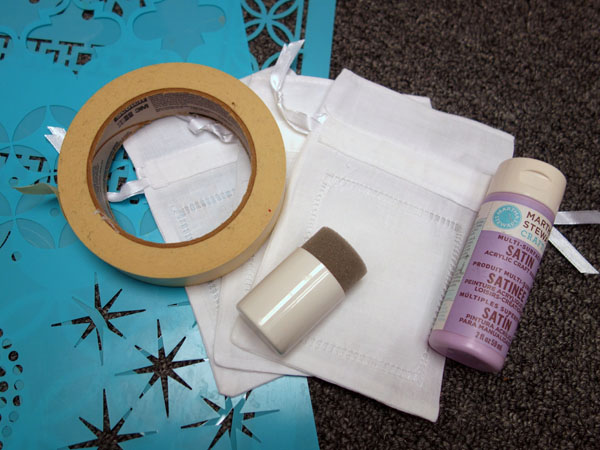
One way to personalize a favor bag is to stencil it with a design. All you need for this craft is some linen favor bags, fabric paint, variety of stencils, a paper plate, a craft foam pouncer and masking tape.
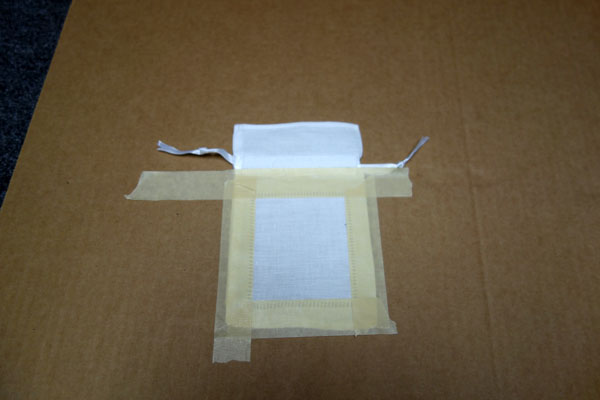
The instructions are pretty simple. First, iron the favor bag so that there are no wrinkles in the fabric. Trust me wrinkles can throw off your design big time, especially if the stencil has an intricate pattern.
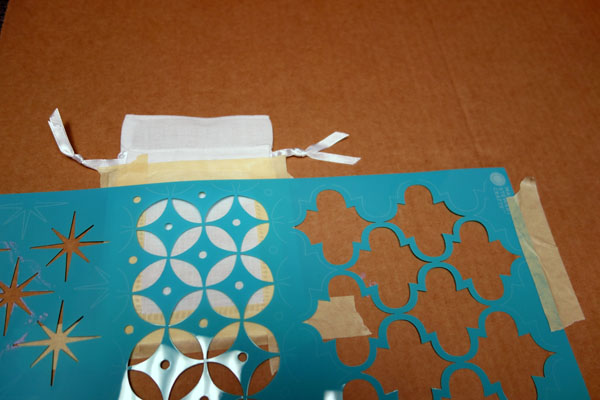
Use masking tape to cover the areas of the bag that you do not want paint on. In my case, the hemstitch border and the edges of the bag.
The next step is completely optional but since you are already going to tape over the favor bag edges, you may want to consider taping down the favor bag to a large piece of cardboard at the same time. Since the bag is small it will tend to shift while stenciling, taping it down will help.
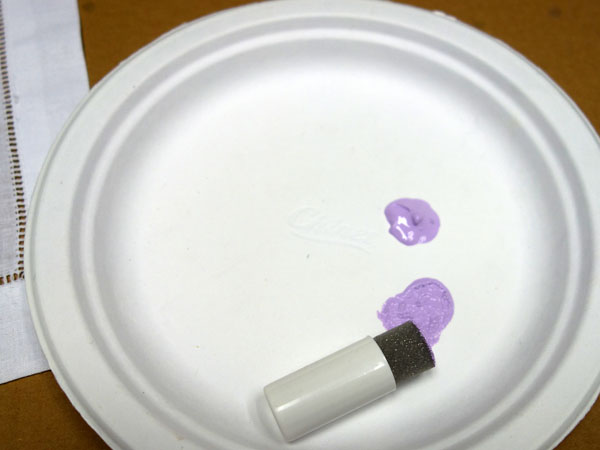
Squeeze some fabric paint onto a small paper plate.
Dab the fabric paint with the pouncer and then “pounce” off the excess paint on the plate. There should be very little paint left on the foam tip. You want to do this so that when you are ready to stencil, the paint is less likely to go underneath the stencil and bleed through the fabric. As a precaution you can stick a piece of paper in between the layers of the favor bag but it shouldn’t be necessary.
Place the stencil in the desired position on the bag. You may want to tape down the stencil also.
Lightly dab or “pounce” the paint over the stencil onto the favor bag. Build up the color by using multiple layers of paint versus using a lot of paint upfront. Note: you can also use a dry paint brush technique instead.
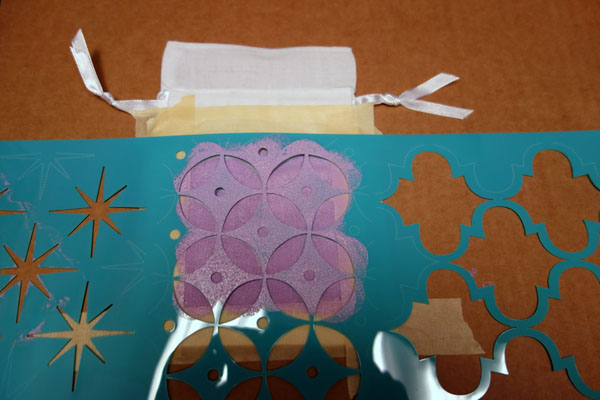
If the stencil does not cover the entire space be sure to let the paint dry before starting on a different section of the favor bag . The paint should dry pretty quickly.

Repeat for the remainder of the favor bags. You can use the same stencil for all but I love variety. In my case, I used several different stencils using the same paint color. It would look equally as cute using the same pattern but using different fabric paint.
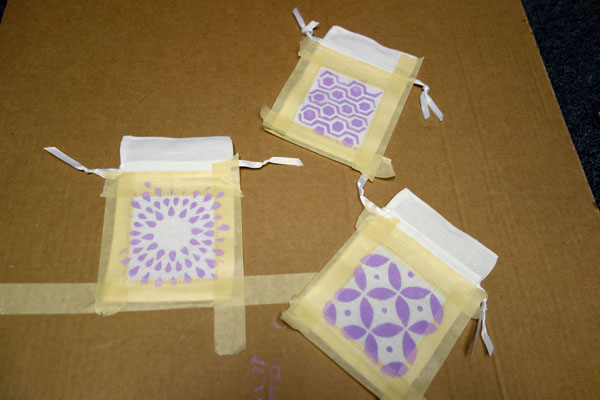
Once dry, remove the masking tape from the favor bags.
The final step involves setting the fabric paint. You can do this by dry ironing it on a low setting on the back of the favor bag. By setting it, your fabric paint will not run if it gets wet. Please note that all fabric paints have different setting techniques so be sure to follow your paint manufacturer’s instructions.
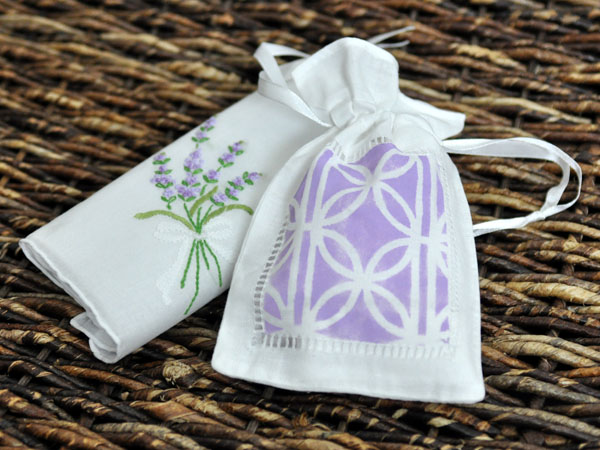
Pretty simple but super cute.


I love your ideas they are such a blessings. Thank you for sharing God will bless you back you can never out give God without in He will overflow with his giving back to you